
1) I want to morph the eyes from this sculpture onto the man's face. First we need to make the color of the sculpture match the fleshy pink of the man's face. Fortunately the light source is coming from a similar direction and the angle of the head is similar.
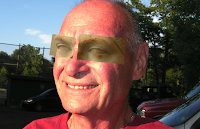
2) I used the rectangular marque to make a selection around each eye of the sculpture image and used the move tool to drop those pixels into the image of the man's face. I transformed each (scale, rotation) slightly to fit the structure of his head.
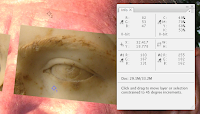
3) I selected the eye dropper, set the sample size to 11 x 11 and SHIFT-clicked on the sculpture(make sure you are on the right layer) in an area where the most average color existed. By average I mean, not in the dark shadows or highlights but the local tone of the majority of the sculpture. I then went to the layer with the man's face and SHIFT-clicked the average tone there as well. You can see what areas I selected in the above image. Each shift-click creates a target (labeled #1 and #2 in this example) that represents the RGB values (labeled #1 and #2) that have now popped up in the info palette. In the above image the RGB in the sample of the man's face (#2) is R255, G182, B162. The sculpture sample area (#1) is R183, G167, B131. To get the sculpture color more like the flesh of the man's face we need to make the RGB values for the sampled area of the sculpture to match the RGB values of the man's face. It takes a lot of words to describe but it's very straight forward. Here's how to proceed:
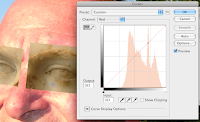
4) To alter the exact values on your sculpture layer to match the exact values on the flesh you need to tell photoshop the exact area of the curves that needs to be affected. To do this view each channel (R, G, or B) individually in the curves palette and APPLE-click the target sample on the sculpture layer (in the above image it's #1). As a tip make sure you are on the layer of in the layers palette that you want to affect.
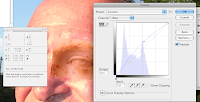
5) Once you have APPLE-clicked the target in each of the channels you can use the up and down arrow keys to nudge the values displayed in the info palette for #1 to be exactly like #2. Remember all this is just a matter of taking one set of RGB numbers and getting them to look just like another set of RGB numbers. That's it.

6) Above you can see the results of matching these values and how those affect the curves in each channel. You can also see how the sculpture layer has a very similar color range to the flesh of the man's face. Check out the #1 and #2 in the info palette. They are just about spot on.
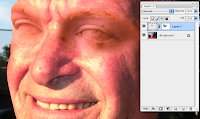
7) I added a layer mask to the layer of the sculpture eyes and used a soft brush around most of the pixels to blend the two layers together. I used a harder edge around the outter left edge where his face meets the sky.
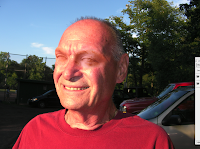
8) In the end I ended up going back into the curves once more to adjust the overall RGB for each eye to increase the brightness of the midtones in the eye on the left and decreased these values slightly to darken up the eye on the right. I also slightly desaturated the eye on the right using hue and saturation because I felt like the colors had grown a bit too intense. There's no one fix-all for such a make-over but I did the majority of this exercise using the eye dropper, the curves and the info palette.
No comments:
Post a Comment